
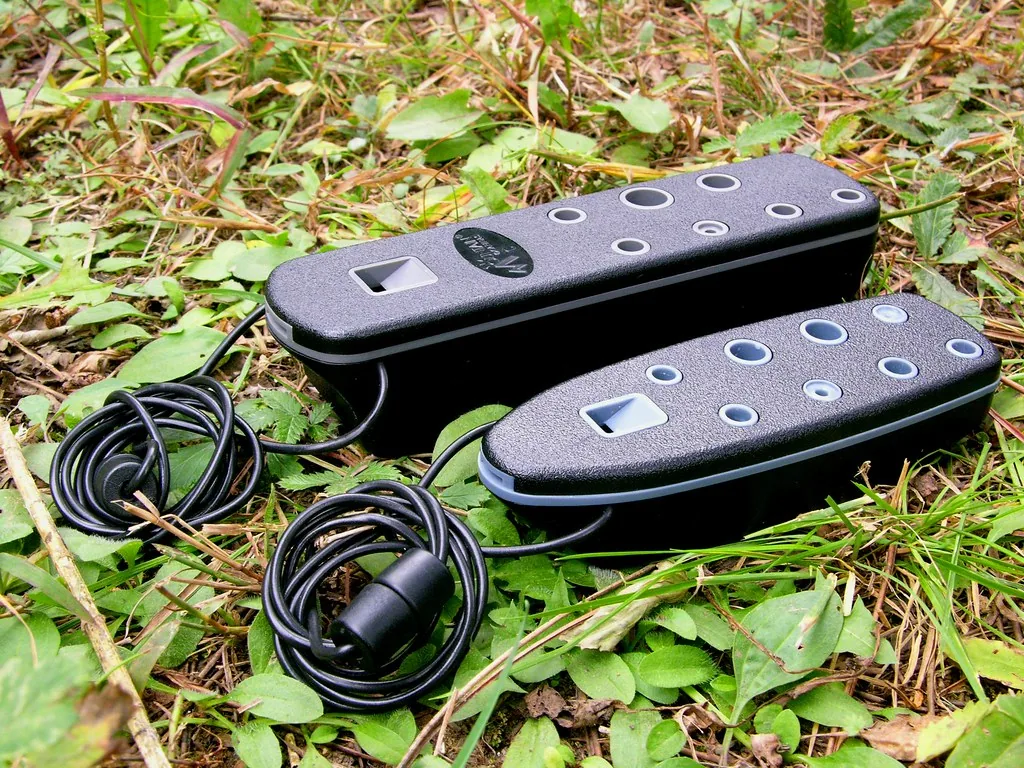

Welcome to this clear and accessible guide for beginners learning this ancient instrument.
94% of new players manage to play their first melodies quickly thanks to simple methods and regular practice.
This guide explains every technique and type of notation to help you progress quickly.
You will learn how to understand the number of holes, range and fingerings, as well as the common mistakes to avoid.
STL Ocarina models are often recommended for their reliability and make it easier to learn the basic notes.
If you want to go further, follow this short, comprehensive practical tutorial to learn how to read ocarina notation.
Introduction to the world of the ocarina
Start by understanding the key elements—model, number of holes and techniques—to progress quickly.
This small wind instrument, often made of ceramic or plastic, is appealing because it is simple and fun to play. Regular practice improves cognitive abilities by around 37% in dedicated players.
To progress quickly, consult a guide to learning your first notes that explains the number of holes, range and fingering diagrams.
Tablature offers an accessible alternative to conventional sheet music. It helps beginners play melodies without complex music theory.
- STL Ocarina: a variety of models for every type of musician.
- Use a metronome to master rhythm and note duration.
- Avoid common mistakes, such as poorly controlled breath, by following technical advice.
| Aspect | Why it is useful | Quick tip |
|---|---|---|
| Number of holes | Determines the scale and fingerings | Check your model before you start learning |
| Material | Affects the sound and durability | Ceramic produces a rich tone |
| Method | Speeds up learning | Combine videos with practical exercises |
Why beginners should use tablature
Visual diagrams quickly transform how beginners learn fingerings and breath control.
82% of beginners choose this format, according to STL Ocarina’s 2023 study. The graphic representation of the holes makes notes easier to identify and reduces confusion caused by music notation.
Teacher Gina Luciani finds that her students can play pieces after only three sessions with this system, compared with six sessions using conventional sheet music. This time saving helps sustain motivation.
The diagrams immediately show where to place your fingers on your model and help you focus on breathing, note duration and tempo. Using a metronome encourages regular, accurate practice.
- Online resources offer melodies suited to different numbers of holes.
- Intuitive symbols clearly indicate accidentals and octaves.
- This format is ideal for beginners who want to progress quickly and gain confidence.
To learn more about note sequences, consult this short guide to ocarina notes.
Choosing the right model to make progress
A well-chosen model makes learning easier and keeps you comfortable.
Materials and ergonomics: the differences
Comfort and shape: ergonomic studies show that a transverse instrument can reduce fatigue by up to 40% compared with a pendant model.
12 holes: versatility — 12-hole models, including some offered by STL Ocarina, cover an octave and a half. This helps you progress quickly across a variety of melodies.
- Check the number of holes: the tablature and conventional sheet music must match your model.
- Avoid poorly tuned copies: they discourage 68% of beginners.
- Regular practice on an ergonomic model improves note accuracy and fingering fluency.
- A metronome helps you keep time and master note duration.
Consult resources and diagrams made for your model. Following a structured method will enable you to read tablature and interpret its symbols without confusion.
Ocarina tablature: how to read tabs step by step
Start by identifying the simple symbols that show which holes to cover to produce each note.
Step 1: identify the filled circles, which indicate closed holes. The diagrams also show the open holes for each note.
The ideal pressure for a clear sound is 2 to 3 cm H₂O. Control your breath to prevent condensation and muffled notes.
The upper holes are numbered 1 to 6 and the lower holes 7 to 12. This numbering makes it easier to learn the fingerings and read the diagrams logically.
- Follow the arrows and symbols to adjust the strength of your breath.
- Use a metronome to maintain the tempo and note duration.
- Regular practice makes transitions smoother throughout the range and octave.
| Tip | Effect | Simple action |
|---|---|---|
| Pressure of 2 to 3 cm H₂O | Stable, clear notes | Breathe gently and control your airflow |
| Numbering from 1 to 12 | Quick fingering recognition | Learn the order of the holes |
| Metronome | Steady rhythm | Practise for 10 minutes a day |
To learn more, consult this practical guide explaining how to read ocarina notation. By following this step-by-step method, beginners will quickly decipher the symbols and play their first melodies without complex music theory.
Understanding symbols and visual notation
Mastering visual cues transforms your practice and reduces your reliance on conventional notation.
Filled and empty circles
Filled circles indicate holes that must be covered completely, while empty circles mean that the holes should remain open.
These diagrams help beginners memorise the fingerings for their chosen model.
Breath markings
Arrows on the diagrams show breath intensity and note duration.
The 4-4-4 method (inhale for 4 seconds, hold your breath for 4 seconds and then exhale for 4 seconds) improves respiratory endurance and your ability to sustain notes.
Managing repeats
Specific symbols indicate when a phrase or measure should be repeated.
Practise following these markings slowly before increasing the tempo and playing across the entire octave.
- Pay attention to the rear holes: misreading them changes the range.
- Visual diagrams often replace sheet music to accelerate learning.
| Symbol | Meaning | Simple action |
|---|---|---|
| Filled circle | Covered hole | Cover the hole completely |
| Empty circle | Open hole | Leave the hole uncovered |
| Arrow | Breath intensity | Adjust your airflow |
| Repeat | Play the phrase again | Follow the symbol |
Mastering rhythm and note duration
Keeping a steady tempo quickly transforms your exercises into real melodies.
40% of beginners’ mistakes come from poor rhythm control when learning melodies. Use a metronome, such as the Korg MA-2, to stabilise the tempo and note duration.
Tablature specifies note values, from whole notes to sixteenth notes. Break syncopated rhythms into simple fractions and tap your foot to internalise the rhythm more effectively.
Work on difficult passages separately. Repeat them slowly with the metronome, then gradually increase the tempo. This improves coordination between fingering and breath.
Online resources offer progressive exercises for stress-free learning. For a broader perspective on the time needed to learn music, consult this time estimate and this practical guide.
| Tip | Effect | Action |
|---|---|---|
| Use a metronome | Steady tempo | 10 minutes a day |
| Break down syncopated rhythms | Greater accuracy | Tap your foot |
| Steady breath | Accurate notes | Control the pressure |
Fingering techniques for better intonation
Good fingering technique immediately improves the accuracy and tone colour of your notes.
Hand position
75% of intonation problems stem from incorrect finger placement over the holes. Adopt a relaxed, ergonomic posture to reduce tension.
Cover the holes with the pads of your fingers. This prevents air leaks and stabilises the sound.
Practise without blowing at first: memorise the positions, then add your breath.
The Alexander Technique can correct posture and improve comfort for beginners. Supports can help if you become tired.
Managing accidentals
For F sharp, uncover hole no. 4 slightly while maintaining constant air pressure. Tablature shows these variations and makes accidentals easier to learn.
Practise slowly at first, then gradually increase your playing time to develop fluency and precision.
| Problem | Solution | Action |
|---|---|---|
| Incorrect placement | Ergonomic posture | Check your hand position for 5 minutes a day |
| Air leak | Cover the holes with your fingertips | Exercises without blowing |
| Inaccurate accidentals | Uncover hole no. 4 slightly | Focused work on F sharp |
Adapting sheet music to your range
Begin by marking the highest and lowest notes on the score.
The range determines the span of notes your instrument can produce cleanly. Identify it before choosing sheet music so that you avoid passages that are impossible to play.
If a melody exceeds this range, a quick solution is to transpose some notes by an octave. This preserves the musical line without forcing the sound.
- Check the highest and lowest notes in a score to determine whether it is suitable for beginners.
- Practise transposition regularly to understand fingerings and intervals.
- Use adapted versions of popular melodies when necessary—consult these adapted versions.
A common mistake is trying to play notes outside the instrument’s range: the sound becomes unstable and progress stalls. By adapting your sheet music, you expand your repertoire and play beautiful melodies with confidence.
Common mistakes and practical solutions
The difficulties beginners encounter often concern breath and the airtight closure of the holes.
78% of beginners reported major problems according to OcarinaTabs in 2023, particularly uneven airflow and condensation that muffles notes.
Breath and condensation problems
A squeaky sound can often be corrected by adjusting the air pressure to between 2 and 3 cm H₂O. Breathe slowly and test different pressure levels in stages.
The mirror method helps you check for an airtight seal: place a small mirror near the holes to detect air leaks. It is quick and effective.
- Regularly check the position of your fingers over the holes: incorrect placement produces out-of-tune notes.
- Use an ergonomic support to reduce finger strain and improve accuracy.
- Avoid overly complex tablature at first: apply the 30-second rule to assess a piece’s difficulty.
| Problem | Likely cause | Solution |
|---|---|---|
| Unstable sound | Uneven air pressure | Controlled breath at a pressure of 2 to 3 cm H₂O |
| Leaks | Poorly covered holes | Mirror method and fingering adjustment |
| Finger pain | Poor posture | Ergonomic support and breaks |
Regular practice and online modules help beginners turn these mistakes into progress. Remain patient and methodical: most faults can be corrected within a few sessions, resulting in clearer notes.
Essential learning resources
Well-chosen resources can turn hours of practice into visible progress.
The Ocarina Method Book 1, a bestseller since 2015, remains a valuable resource for structuring your exercises and lessons. It guides beginners step by step and helps them progress with confidence.
STL Ocarina offers more than 300 free scores organised by difficulty. These PDF files and YouTube video tutorials complement the diagrams perfectly, allowing you to observe fingering and breath control in real time.
- Join communities such as OCTalk to discuss holes and notes.
- Check the quality of the sheet music: an error can slow your progress.
- Vary your sources to enrich your repertoire and gain confidence.
| Resource | Benefit | Quick action |
|---|---|---|
| The Ocarina Method Book 1 | Structured method | Follow the book’s plan |
| STL Ocarina (more than 300 scores) | Free sheet music | Choose according to your level |
| Video tutorials | See the fingerings | Watch before practising |
| Forums and PDFs | Advice and flexibility | Download and read when you have time |
In summary: regular practice with reliable resources is the key. Adapt your practice time and materials to progress confidently with this instrument.
Conclusion
Consistency and a sound method remain your best allies for making progress. By practising for a few minutes every day, you will turn simple exercises into real pieces of music.
This guide has helped you understand how to position your fingers over the holes, control your breath and decipher the essential symbols. Choosing a good instrument and reliable resources prevents frustration and accelerates learning.
Continue exploring new melodies and refine your notes step by step. To learn more, consult this practical guide.
Your musical journey is only beginning: share your progress with the community and have fun playing.